A few weeks ago, one of my students asked, “How do lungs actually work?” We’d been covering the human body, and while the diagrams and videos helped, I could tell the concept still felt abstract. That’s when I pulled out this 3D Respiratory System Craft, and suddenly, everything clicked.
This hands-on activity turns a tricky topic into something students can see, touch, and build. And let me tell you, watching them piece together the parts of the respiratory system was not only fun, it actually deepened their understanding in a way a worksheet never could.
Do you want this resource?
You can get it, along with many other materials, in my Teachers Pay Teachers store.
What is this resource?
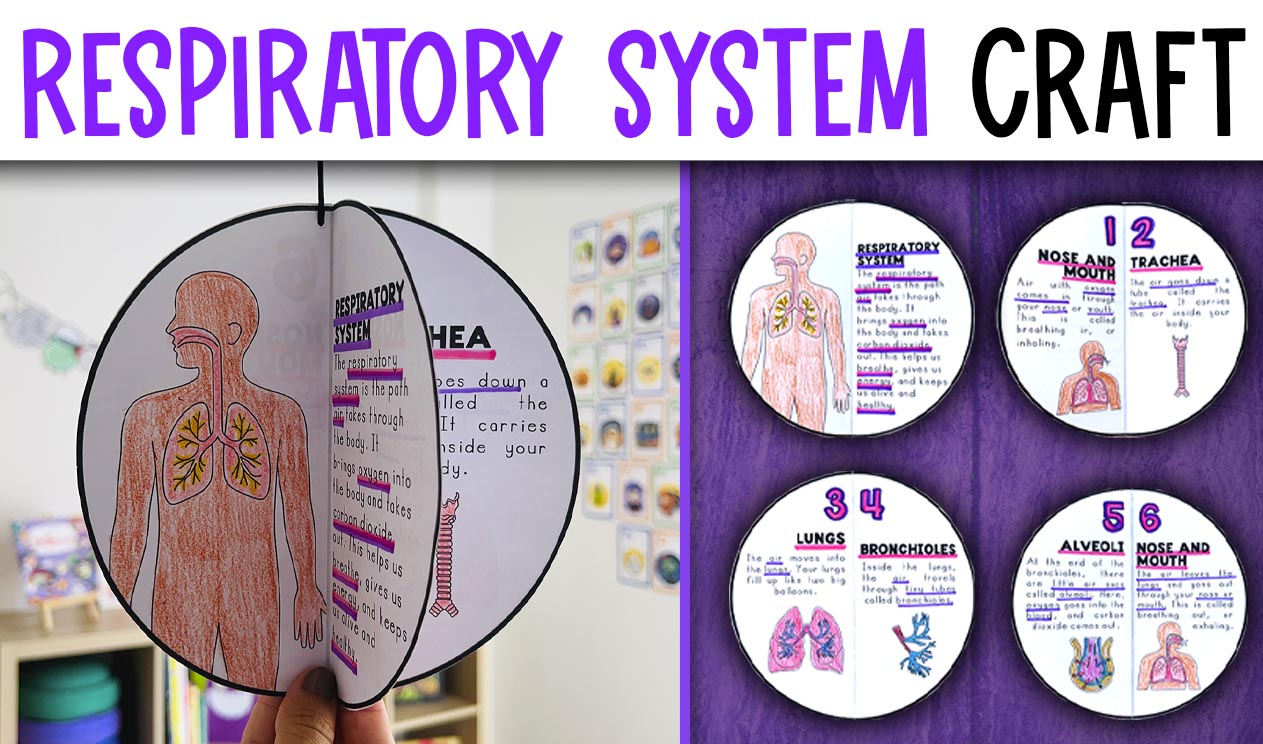
It’s a 3D craft activity that helps students explore how the respiratory system works. From the moment air enters through the nose or mouth, all the way to the gas exchange in the alveoli, each part of the process is included and illustrated in a simple, engaging way.
The model includes:
- The nose and mouth
- Trachea
- Bronchi and bronchioles
- Lungs and alveoli
Students color, cut, fold, and assemble four separate pages, each representing two stages of the respiratory system. Once completed, the parts stack to create a vertical 3D model that they can hang with string—making a perfect classroom display!
How does it work in the classroom?
I’ve used this during our human body unit as both a main lesson activity and an option for early finishers. The step-by-step photo instructions are clear and easy to follow, which means students can work more independently.
For younger students, I recommend going over each page together before they start assembling. You might even want to pre-cut some parts if you’re short on time. Older students can typically manage the full process on their own—and they love the end result.
What skills are we developing?
This activity blends science with fine motor practice, creativity, and spatial understanding. It’s especially helpful for visual and kinesthetic learners who benefit from building and moving parts to process information.
- Some key concepts covered:
- Parts of the respiratory system
- How oxygen travels through the body
- The function of alveoli in gas exchange
- The overall process of inhaling and exhaling
It also encourages sequencing and labeling skills, especially if you ask students to explain the order of airflow as they assemble the craft.
Ideas for classroom use
Science centers: Break students into small groups and have each group build one model together.
Review project: Use this as a culminating project at the end of your human body unit.
Display and present: Once they’ve built their models, have students label each part and present the pathway of air to the class.
Interactive bulletin board: Hang the finished models around a respiratory system anchor chart to make your science wall pop.
